Tuesday, June 30, 2009

Inexpensive Frames


Check out the border hanging up in our playroom. Its made from our favorite childrens book
If I were a Lion
. We were looking for an inexpensive and cute way to frame each page because after all there are 13 of them! My sister-in-law gave us this great idea that she uses. (She's just innovative and creative like that!)

1. We went to Home Depot and had them cut thin (particle board like) wood. We wanted a border around each page to give a "framed" look, so each board is 1 1/2 inches bigger than the page.
2. Then I primed and painted the boards. Its a good idea to pick a color that not only compliments your walls-but also ties together all of the pictures. In my case I picked a bleuish teal color that is used on the time out chair in the book.
3. Spray on Adhesive to glue on pictures. The spray adhesive is absolutely the way to go with paper unless you are a Mod Podge fan--it leaves no clumps or residue, dries quickly and clear and well it sticks.
4. Attatch picture hanging hardware on the backs of the boards. And hang!

Wood: 13 dollars (plus I had a LOT of left over that I intend to use for other projects)
Spray Adhesive: $2.50
Primer: Had in my Garage
Paint: $7.50 (the smallest can was way more than enough!)
Picture Hardware: In my Garage

To frame 13 pictures total $23 Can't beat that!

Sunday, June 21, 2009

Happy Father's Day!

Cupcake Treats!

.
I decided to try this cute idea found on Bakerella's website. (I just LUV her--but she doesn't know it---I'm a shy reader...) It was soooo easy and FUN to make! They turned out awesome! And most importantly they tasted good too-my husband loved them. These would be perfect for a baby shower, a BBQ or anytime you ever need to bring a cute little treat!

Saturday, June 20, 2009

Big Garbage Pick-Up Day


OK
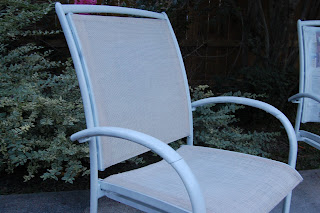
Everyone is packed up and we are headed to downtown Houston to go to a splash park when I see...the garbage truck picking up...a patio set! Well...a really used, mostly destroyed patio set minus the table. Anyway I knew I could salvage the chairs and make them beautiful again. Besides I have been wanting some patio furniture for a looooong time now, but not for $500...or the $200 people are trying to sell it for on Craigslist. No...free sounds much more reasonable!!
Only problem: transporting. The same problem I have every time I find something awesome.
Good news this time! My mom was visiting while Hubby was out of town on business and she has a bigger car!! We loaded it all up and I was excited about fixing it up!

The seats had gashes all the way through them. I thought--no problem we will just sew together some new seats--only the price for outdoor fabric is...awful $65/yard? Not what I had in mind.
So we thought about it for awhile...and my mom had a stroke of genius! We had 4 chairs-really only needed 2...So we took the backs off of 2 chairs and made them seats. This required a lot of bolting, pulling and rescrewing...but it worked! Then I taped and spray painted the chairs white!
Total cost: $6.99 (spray paint)

Diaper Cake

My mom came to visit and while she was here she helped me put together this cake for a baby shower I am throwing next week. It was way simpler than I thought, but most things are when you sit down and do them. I think it turned out pretty cute.

Saturday, June 6, 2009

Framing the Builder Mirror


I have seen this project done all over bloggy world and decided to give it a go myself!
My fireplace needed something BIG, and I loved how the previous owners had a mirror hanging there. The project itself was super easy-not as cheap as I expected--but still not expensive either-and a really great deal for a PRETTY and BIG mirror with a frame. I think the toughest part of the whole thing was dragging my 2 babies to Home Depot while my husband cut the boards for me. We simply measured the mirror, picked out the boards in the molding section of Home Depot, and cut them into appropriate sizes. At home we simply applyed the glue-and let it seal the wood to the mirror. Easy Peasy. A few people at the store recommended using Liquid Nails as the adhesive. and its holding up well! My mirror got cracked when it was being "handled" and so I had to come up with some spontaneous "decorating" to cheer it up. My next dilemna is hanging it on the brick fireplace...its ridiculously heavy...any suggestions?


Cost of Mirror: $5.00 to a friend who had it laying in her garage.
Cost of Molding: approximately $18.00
Glue at Home Depot: $3.00
Scrap Paper: found in my craft room
Letter S: $0.75 and covered with fabric from my craft room

Friday, June 5, 2009

My chic trunk!

Remember my junk find? The beautiful trunk from Goodwill? Well, I finally finished the outside of it! I know your dying to see what it looks like...but first you have to listen to me ramble about beautification process...or you could just scroll down and check it out. My original plans for this trunk were altered twice-but I am so happy with how it turned out! Originally I was planning on doing the brass hardware a silver color-because I think that is soooo classy. I roughed it up a little bit with sandpaper and found that it was extremely difficult to get the paint to stick in any way where it didn't look painted...so I decided to go with the flow of it and painted the trim white, I was hoping it would turn out to look vintage chic-or purposely obvious that I had painted it. The rest was a breeze to paint-just took a little bit of sweet time, and 2 coats. I sealed it with a spray sealant so that it wouldn't get roughed up too bad in the toy room. After all---poor girl has been through a lot! I think she turned out lovely-and she matches my LR couches, so when she has retired from the baby toy business I will move her in to be a coffee table or a blanket storage for those cold Houston nights. LOL. As if that ever happened!
Before:After:
What do you think?