Wednesday, April 21, 2010

DIY couch cover --the lazy way.

I GOT NEW CARPET!! And since I did....I thought it was a good time to move things around! While re-arranging and came up with too many couches in one room and too little seating in another. My little boys room needed a seat to read stories on before bedtime and to jump off of and reek havoc with at all other times. So we toted in this beauty from the other room. 
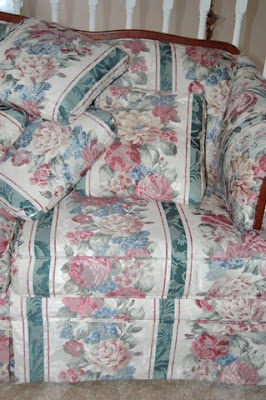
We got this couch for free from a friend a long while ago, and they are sturdy and beautiful but not the right style for my son's room. Which I love so dearly. Its perfectly co-ordinated and big floofy flowers just threw it all off. I looked into couch covers. EXPENSIVE. I geuss I could have left it...but I JUST COULDN'T. Floral for little boys...not cute.

I went to the clearance section at Walmart. (I know not everyone is a Walmart fan---but----if I can get a BRAND NEW sheet set for 25 CENTS, well....I am sold.) This is a King size sheet. I simply folded and stuck pins in at crucial places. Lets see how it holds together...but its washable, its cheap, and in my opinion...it looks good!And my son's favorite part of the room: Tissue Paper "clouds"
from Martha Stewarts blog.

(he thinks they are "loons!" (balloons)Use what you have! You can make your home beautiful without spending tons of money. Move things around, use a little fabric, try your local freecycle, and have fun!


Sunday, February 28, 2010

Window cushions and book shelves

(After Picture)

I love window seats. When I saw the window in this room of our house, I knew it had to be my daughters room. I love the idea of reading books with the sun peaking through the blinds.
This window needed a little girly-ing up, so I got to work.I made these cushions for her window. I couldn't find a pattern or tutorial on-line or anyone who might be able to show me---so I made it up myself. I wish I would have made instructions as I went a long. Truthfully I couldn't tell you how I made it even if I tried!

I thought it needed a few cute little pillows for the sides, and my daughter agreed. In fact she helped me make them. She stuffed them herself and was SO proud. I literally used 2 dollar dish towels from the dollar section at Target. They are so easy to make!
My husband helped me with the slot shelves for her room. Before children learn to read they choose books based on the front of the cover instead of the side binding. That's why little kids dump all their books on the floor in pursuit of the "kitty" book. They need to see the front. So I wanted some sturdy library style shelves and a fraction of the cost. For the wood and brackets to install it, I payed around $13.00 for both shelves. We measured and cut the wood, painted and hung! (Email me for more elaborate details on this project.) Later I decided it needed a little more color and hand painted the flower design. Its a huge hit with my kids, and so much easier to keep organized.

Saturday, January 23, 2010

Bathroom Makeover X2

I have just completed my first goal of the new year!
It turned out to be slightly LESS fun, and slightly MORE work than I thought.
To be fair my husband warned me of this,
and that he would not have much free time to help.
So here is my bathroom redo x2.
#1
I'll start with our geust/kids bath.
It was yellow, with peely butterfly wallpaper.
The wallcolor made the counter and bath look dingy and yellow. Yuck.For whatever reason
I liked it when we moved in.(I claim pregnancy brain!!)
But I have hated it ever since my baby was born. heh.

This was pretty straightforward, paint does a lot for a room.
I took down the wallpaper, sanded some rough spots
spackled and covered the walls in primer (twice)

I would like to say that I hate wallpaper. Its terrible.

The paint color we picked out was a light tan.

We were hoping to neutralize the bathroom and tie it in with the rest of the house.
I had to paint at night and during nap time, and since the lights were uninstalled
I didn't realize that my tan bathroom was

actually PURPLE.
I geuss 2 coats of primer wasn't enough.

Good thing I like it. Because I do not feel like painting it again.

I am debating putting a frame on that mirror before I hang it back up.
Its simple, but it feels clean and I like that. I am still looking for something to hang above the towel rack...so its not QUITE finished.

#2
Our downstairs half bathroom

turned out to be a total nightmare.

It was covered in Wallpaper, that was peeling everywhere.
I figured since I was doing one, might as well do both.

(little note *wallpaper, in a bathroom where there is a lot of humidity is a bad idea, if you are thinking of doing it, stop now! Take a cold shower, or find someone who will talk sense into you!)

Let me show you:

It was 20 years of wallpaper painted over wallpaper over wallpaper.

(Funny thing about the Wallpaper: When I was pregnant with Grayson, I always misread the print on the wall to say "Fond memories of skinny days" instead of "Fond memories of sunny days".)

The wallpaper disentigrated the actual wall,
so it was patchy and coming apart.

It had to be fixed.
It took me 2 days of every naptime, bedtime and early morning to get that wallpaper off.
We had to remove the back of the toilet to get behind it.
(When I say WE I mean ROD)
and in the process broke the lid of the tank.
I went through 4 paint colors to find one we both liked.

(My favorite thing in this bathroom. Umbra Flowers. They are 3d. I love them. I seriously want to put them all over my house. And I just might.)

Take that 2010.

You may have me whipped in every other arena.

But I have new bathrooms :)


Thursday, December 17, 2009

Christmas Snowmen Treats for Kids

While my mom was visiting, we made these cute little Snowman pops. Once we figured it out it was easy, but I made about 20 messy ones first!
(don't laugh, it could SOOoooooo happen to you!)

To start, I placed the marshmallows on sucker sticks. (opposite of how you would to roast marshmallows, through the belly--not the bottom), and dipped the circular sides in peppermint melt. Then decorated with mini M&M's. This is something that a little child could easily do, the candy melt is warm but cools fairly quickly.

Saturday, December 5, 2009

LDS Young Women Theme Scrap Belt


I just finished my 4 LDS YW Theme Scrap Belt.

(whew! That's a mouthful!)

Christmas is coming up and I wanted to make something for my Miamaids (the teenage girls I teach at church) I thought I should hurry up and post it on here, in case you want to try them out!

I followed a tutorial from Little Blue Boo. (I just started following her, and she is amazing!) Head on over! I also ordered ribbon from LDS Vinyl, (It has the Young Woman values printed on it)

This is a budget friendly project. Especially if you have scraps of ribbon lying around. The first belt took me 2 hours exactly, but once I got the hang of it I did 3 belts in that same amount of time. Its a BEGINNING sewer project. The belt shown in the picture is the one I made myself, with more pinks and green's. I get ton's of compliments on it. So I decided to make them for the girls.

They turned out so cute--(hope the girls like them)

AND...They are so versatile...
With all those colors---what wouldn't it match?!


Wednesday, December 2, 2009

Pretend Make-up for Toddlers


We recently celebrated a birthday at my house. I wanted to share this little gift with you-It was a HUGE hit, cheap, easy, and cute!

My little girl loves mommy's make-up.
What little girl doesn't?
I looked and looked for a pretend make-up set,
but all of the "pretend" ones, have REAL make-up in them.
No thanks!

So instead I went to the dollar store, picked up a few eyeshadow and blushes with brushes.
I came home and cleaned them out, and then poured different colors of NAIL POLISH in them.
Let them dry in the garage.

Worked like a charm, my girl adores it, and it looks very very real. In fact my husband always asks me if its my make-up when he see's her...occupied.


Quick tip: The eyeshadow is a little gross to clean out, I used soap and water on the first one, and on the second one I just kept it dry and cleaned it out with a popsicle stick. I would recommend keeping it dry and chipping it out. . .
Really makes you think about what is in that stuff....yuck!!

Sunday, November 15, 2009

Play Mailbox

My husband and I are getting ready
for a little get-away.
I know it will be hard on my children,
and even though I am excited, hard on me.

I decorated this cute little mailbox for them to open everyday,
inside will be little activities,
family pictures and little treats to cheer their day.
I hope it makes their experience a little happier.
And it turned out cute!

You can find these little Mailboxes at Hobby Lobby, Micheals, and Joanne's.
I decorated mine with scrapbook paper Mod Podge, Ribbon and Felt.